Jump to content


Photo
* * * * * 2 votes

Reviving A -99 Tdm 850


  • Please log in to reply
154 replies to this topic

#101 anda3243

anda3243

    really likes Carpe

  • Member
  • 89 posts
  • Location:Stockholm
  • TDM model: 1999

Posted 09 January 2012 - 11:21 pm

Getting the engine to run

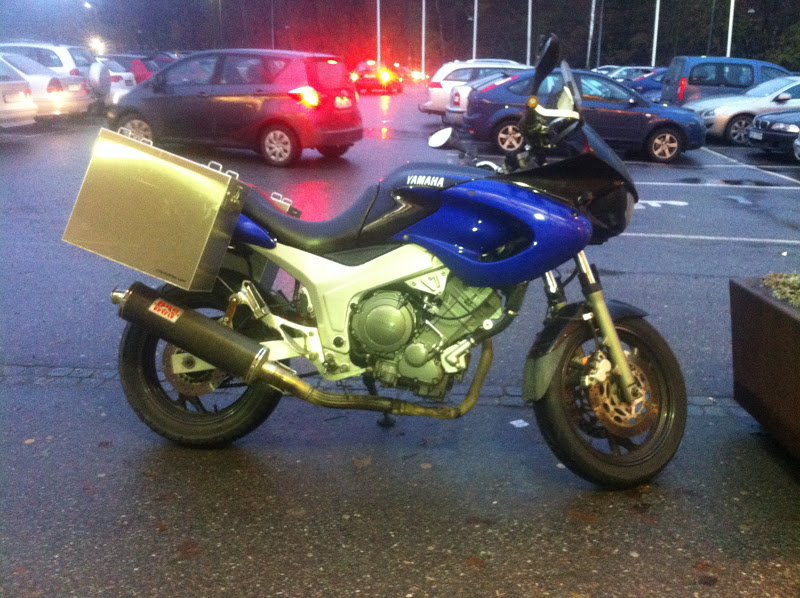
So, the last thing was that the starter motor did not turn, or even click.
This turned out to be an easy fix. I consulted the manual, and found out that there is an electronic system that prevents the starter from turning if the sidestand is down, and if a gear is engaged without the clutch being pushed in.
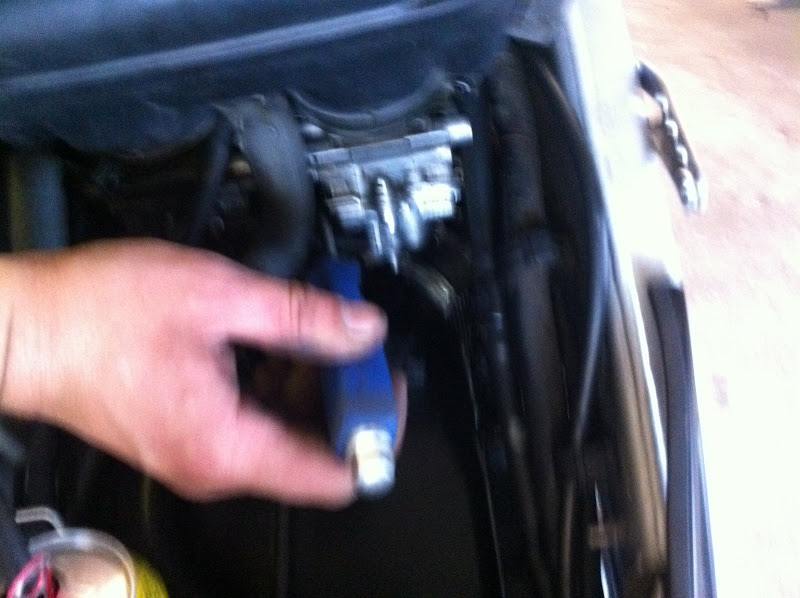
I could easy narrow it down to the neutral switch connector, since I had not connected it. laugh.gif
The neatrual switch connector is behind the front sprocket. With only one cable leaving it. The cable is connected to ground when in neutral.
I cut of the connector with a piece of cable from the 850 engine and soldered the cable coming from the 900 engine.


Then added some insulating tape. Since the connector is from the 850 engine it will fit to the harness.

Then test to crank around the engine. The fuel filter and pump and the gas tank was fitted. The fase cables from generator were fitted, and the cables for the pickup coil.
The bike was ready to start. And the starter cranked the engine now.
But it would not start, It kinda ignited a little sometimes, but did not start. ranting.gif
Then I put the charger on to charge the battery, and went to inspect the 850 engine, and find what differed.

After a while I found these "cogs" on the outside of the rotor that go to the pickup coil and gives the ignition timing. dry.gif
Then I took of the generator cover from the 900 engine to inspect the 900 rotor, the "cogs" are different. It all became clear.

On the 900 rotor (on the left) there are a great number of cogs with an even pitch. On the 850 rotor there are a smaller number of cogs, and in a more random order. The cogs on the 850 rotor where arranged so that the spark would be timed. The bike would obviously not run with the 900 rotor, since the ignition timing was completely of
I think that the cogs on the 900 rotor are for giving an exact engine speed with a good resolution to the ignition control unit. Complemented with another signal from a sensor on the exhaust camshaft, that indicates every turn of the camshaft/engine.
What to do know? Can I get the bike running? I even posted here asking for advice.

Note that in the reality the rotors are not removed yet.

Removing the bolt from rotor, the easy part.


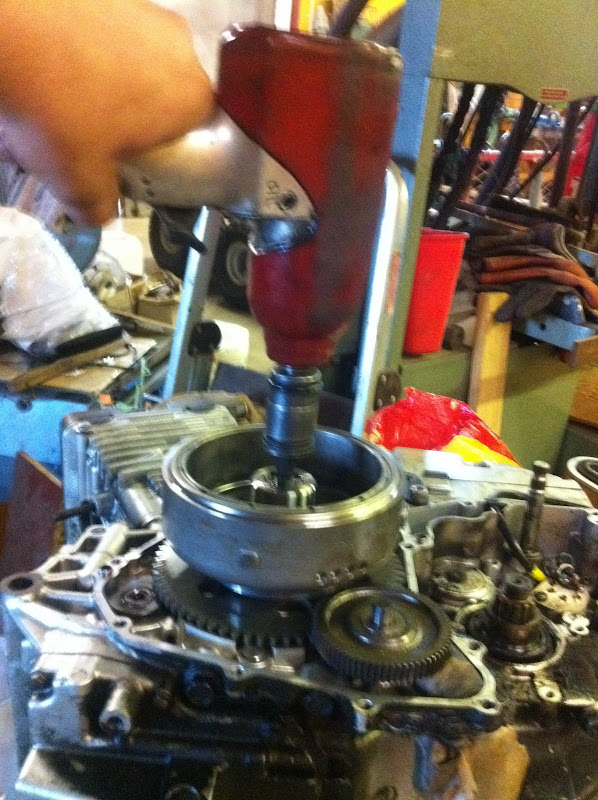
Here are the bolts holding the 850 and 900 rotors. They are identical.


Preparing one of the bolts with the lathe.


The first attempt with some kind of rotor removal contraption, it failed of course smile.gif


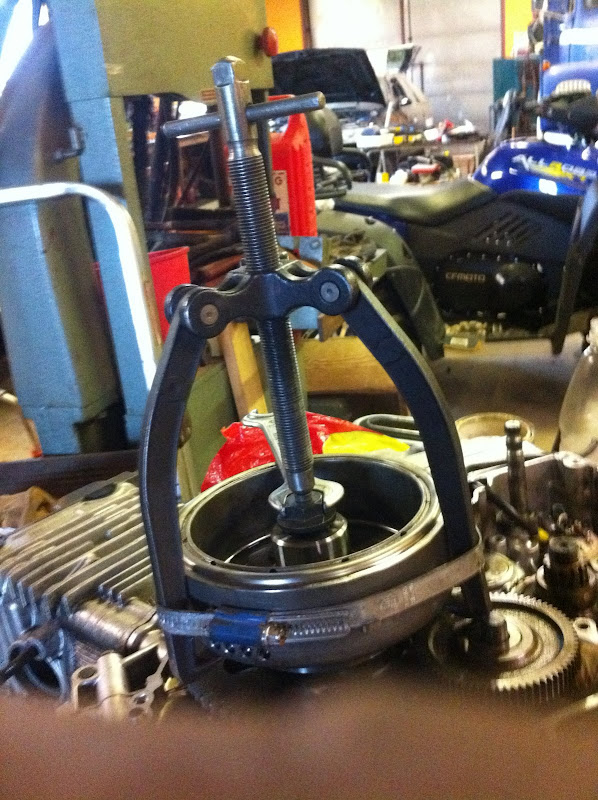
Then, after reading about some kind of special removal tool, and finding three M8 threaded holes in the rotor, work with designing a special tool could be started.
I took a used pulley, made a grove with the right diameter in the lathe....


And drill 3 holes in it with 120 deg pitch. Same bolt pattern as the threaded holes in the rotor. The bolt pattern didnt match perfectly, but good enough.


Then turn away some more material


Prepare some bolts, and assemble the new special tool


well, until now it was easy. The rotor did not want to let go of the crankshaft.
I tightened it down properly, used a small hammer, then the bigger hammer, nothing.
Tightened the bolts down some more.
I did not want to heat up the rotor, or use too much violence, the magnets could get damaged.
I bought a pneumatic rivet hammer, since some had succeeded using one. Hamared with it until I destroyed one of its tools.
After two days with the special tool applying pressure the rotor it finally let go of the crankshafts end.

The same procedure on the 900 engine went much easier. Maybe because it has not run as many miles.

Here are the tools I used. The thing with 3 arms, is not really necessary tho


Then the both rotors could be compared. And great success. It seemed to be the same taper on both rotors.
I did some measuring on how the axial position would be of the 850 rotor in the 900 engine, and it would fit perfectly. Great.

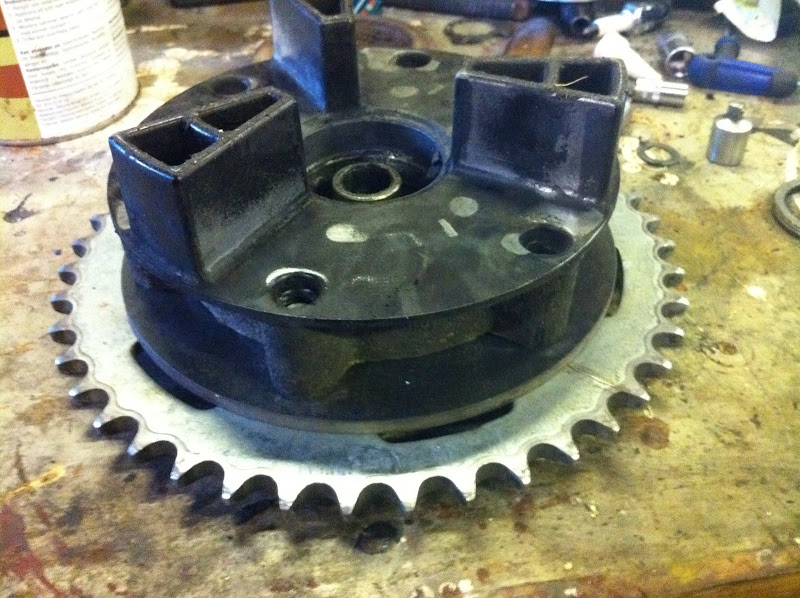
Behind the rotor there is a freewheeling gear for the starter. The freewheel is engaging the rotor, which is connected to the crankshaft. In the part catalog the 900 and 850 gears have different part numbers, when comparing them, the only difference is that the 900 gear is made lighter.
On my 900 engine I use the 900 starter freewheel sprocket with the 850 rotor. Works great.

Then clean everything of, put back all starter gears, tighten down the rotor centre bolt, put back the generator cover. And startup. It fired up almost immediately, and run great. Nice.
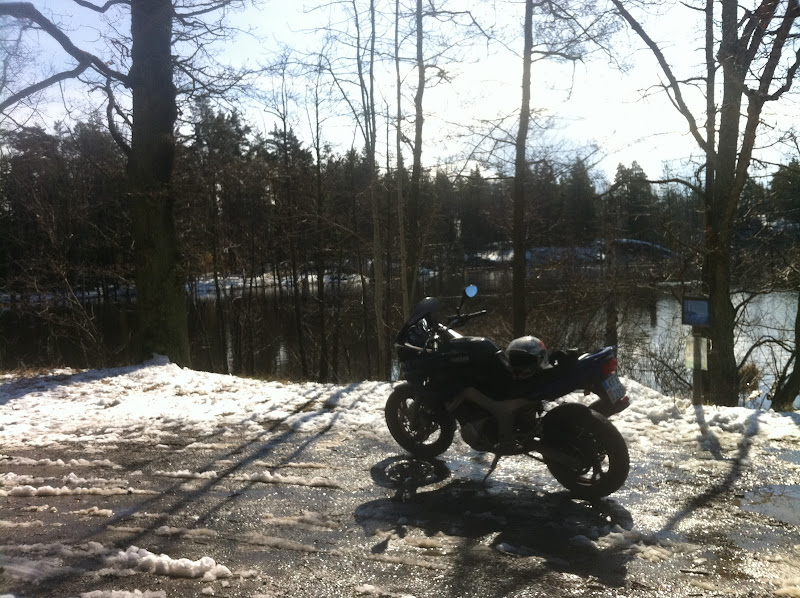
I let the bike run for a while. Checked the coolant level. There was some smoke, but that is expected.

cake eating.gif

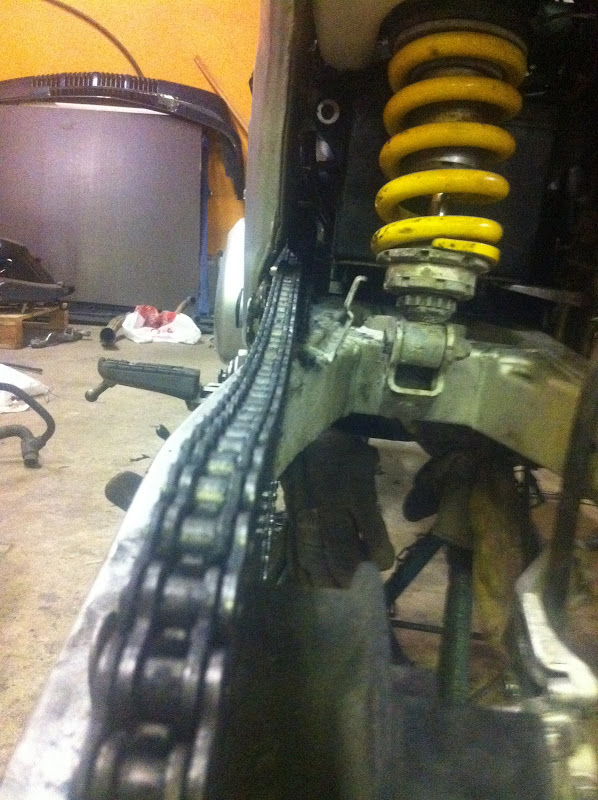
Next, fix the chain, and the first ride.

Edited by anda3243, 09 January 2012 - 11:25 pm.


#102 MikC

MikC

    Carpe fan

  • Member
  • Pip
  • 159 posts
  • Location:Staplehurst, Kent
  • TDM model: no more

Posted 09 January 2012 - 11:30 pm

Bloody Hell. What a job. And what a result. Great and well done mate.
You must be well pleased. biggrin.gif

Mik
''Work'' The horrible four letter word

#103 dapleb

dapleb

    Monkey Boy

  • Root Admin(A)
  • PipPipPipPipPipPipPipPip
  • 18,279 posts
  • Location:The home of morris dancin
  • TDM model: 1990

Posted 10 January 2012 - 07:16 am

laugh.gif I have had one alternator just plop off without too much trouble at all. The next one required some tactical heat (not too much) and a 3 legged puller (which it bent). It went off loike a shotgun. Interesting to know about the rotor differences.

Well done.
"Whats up", "Piston Broke", "Yeah me too...hic"

If you want to mark your location on the Carpe map: http://www.carpe-tdm...opic.php?t=5117

Doin valve clearances? Use dappers valve shim exchange program and the job will be carroty - Free (other than you postin me yer shims) for sporting members.

Active member of TPLQHCSRSFC and TSRMCMAS (even though a year off) and avid fan of PM not sent.

#104 Studley Ramrod

Studley Ramrod

    Monkey Boys Monkey

  • Root Admin(A)
  • PipPipPipPipPipPipPipPip
  • 19,334 posts
  • Location:HELLO ! I'm in the Library...Notts
  • TDM model: 1993

Posted 10 January 2012 - 08:13 am


Oh I do loike a happy ending ! yahoo.gif

Great to hear the engine's up and running, well done Anda ! drinks.gif

Mk2a 2000 in Silver. Top end Refurb @ 41100 miles, Scottoiler, Renthal Road High Bars, Up & Back Bar Risers, Bellypan, DL650 Handguards, Capt. Picard Bar Ends, House of Henty SS Wheel spacers, New Seat Cover Fitted. 58 MPG !!  Now owned by chrisbee !   Studley's mk2a Bloggerydoodaah !  Photos of my first MK1  Photos of my MK2a  TPLQHCSRSFC No. 1 Fan


#105 3vd

3vd

    PM Sent

  • Member
  • PipPipPipPipPipPipPipPip
  • 2,665 posts
  • TDM model: no more

Posted 10 January 2012 - 11:40 am

Did you get the throttle bodies with the 900 engine?
Could you have retained the fuel injection?


#106 anda3243

anda3243

    really likes Carpe

  • Member
  • 89 posts
  • Location:Stockholm
  • TDM model: 1999

Posted 10 January 2012 - 06:53 pm

It was really nice once I found that the tapered part is the same on both bikes. There was also a key groove in the crankshaft for positioning the rotor. The key is positioned in the same way on both cranks, even tho the crankshafts has different part numbers. Pure luck on that one.

If it had not worked out by changing the rotors, I would be forced to implement ignition from the 900. And by that probably also the injection.

The reason I did not go for fuel injection was mostly because of the extra cost for 900 wire harness, ignition modules, and throttle bodies. The intake manifolds I got with the engine.
Merge the 850 and 900 wire harnesses into one, and get it to work. Sounds fun. laugh.gif

#107 aircooled68

aircooled68

    RTT11 Wales manager

  • Member
  • PipPipPipPipPipPipPipPip
  • 1,581 posts
  • Location:merseyside
  • TDM model: 1998

Posted 10 January 2012 - 07:02 pm

Nice .... good.gif

202323336-M.jpgpost-1-1152402501.jpgpost-1-1150550726.gifpost-1-1150559830.gif


#108 RedRider in COS-USA

RedRider in COS-USA

    arrived on last train

  • Member
  • 4 posts
  • Location:Colorado Springs, CO, USA
  • TDM model: 1992

Posted 11 January 2012 - 06:45 pm

QUOTE(anda3243 @ Tue 10th Jan 2012, 11:53 AM) <{POST_SNAPBACK}>
It was really nice once I found that the tapered part is the same on both bikes. There was also a key groove in the crankshaft for positioning the rotor. The key is positioned in the same way on both cranks, even tho the crankshafts has different part numbers. Pure luck on that one.

If it had not worked out by changing the rotors, I would be forced to implement ignition from the 900. And by that probably also the injection.

The reason I did not go for fuel injection was mostly because of the extra cost for 900 wire harness, ignition modules, and throttle bodies. The intake manifolds I got with the engine.
Merge the 850 and 900 wire harnesses into one, and get it to work. Sounds fun. laugh.gif


Just read the entire story today, amazing tenacity, congratulations and I hope the riding of it is rewarding and fun. Lesson to us all -- change that good quality oil and filter on schedule! Got to find a project now....wcp

#109 anda3243

anda3243

    really likes Carpe

  • Member
  • 89 posts
  • Location:Stockholm
  • TDM model: 1999

Posted 11 January 2012 - 07:37 pm

QUOTE(RedRider in COS-USA @ Wed 11th Jan 2012, 07:45 PM) <{POST_SNAPBACK}>
Just read the entire story today, amazing tenacity, congratulations and I hope the riding of it is rewarding and fun. Lesson to us all -- change that good quality oil and filter on schedule! Got to find a project now....wcp


Or atleast check the oil level regulary laugh.gif

#110 3vd

3vd

    PM Sent

  • Member
  • PipPipPipPipPipPipPipPip
  • 2,665 posts
  • TDM model: no more

Posted 01 March 2012 - 05:35 pm

How's it going with this project?

How did you find the 850 exhaust fitted on the 900 engine?

#111 AdvRich

AdvRich

    sticking around

  • Member
  • 31 posts
  • Location:Adirondacks, NY, USA
  • TDM model: 1992

Posted 12 April 2012 - 12:40 am

Really nice read Anda and good on ya for sticking with it through to running. drinks.gif Hope all is well as it's been a while since your last post.

Cheers,
Rich

#112 anda3243

anda3243

    really likes Carpe

  • Member
  • 89 posts
  • Location:Stockholm
  • TDM model: 1999

Posted 01 May 2012 - 08:16 pm

QUOTE(AdvRich @ Thu 12th Apr 2012, 01:40 AM) <{POST_SNAPBACK}>
Really nice read Anda and good on ya for sticking with it through to running. drinks.gif Hope all is well as it's been a while since your last post.

Cheers,
Rich


Yes it has been some time.
The bike is running just fine. I need to write about how the rear and front sprockets are aligned.

At the moment I am doing valve adjustment. If there is time I will convert the ignition coils to ones that are integrated in the plu caps.
I have replaced the clutch wire, I am now using a 900 clutch wire, the length of the outer jacket of the wire is better.

#113 dapleb

dapleb

    Monkey Boy

  • Root Admin(A)
  • PipPipPipPipPipPipPipPip
  • 18,279 posts
  • Location:The home of morris dancin
  • TDM model: 1990

Posted 01 May 2012 - 08:20 pm

Well done anda and thanks for the update.
"Whats up", "Piston Broke", "Yeah me too...hic"

If you want to mark your location on the Carpe map: http://www.carpe-tdm...opic.php?t=5117

Doin valve clearances? Use dappers valve shim exchange program and the job will be carroty - Free (other than you postin me yer shims) for sporting members.

Active member of TPLQHCSRSFC and TSRMCMAS (even though a year off) and avid fan of PM not sent.

#114 dandywarhol

dandywarhol

    Carpe Citizen

  • Supporting Member(thanks)
  • PipPipPipPipPipPipPipPip
  • 5,324 posts
  • Location:Edinburgh, Scotland
  • TDM model: 2003

Posted 29 May 2012 - 08:34 pm

QUOTE(dapleb @ Tue 10th Jan 2012, 08:16 AM) <{POST_SNAPBACK}>
laugh.gif I have had one alternator just plop off without too much trouble at all. The next one required some tactical heat (not too much) and a 3 legged puller (which it bent). It went off loike a shotgun. Interesting to know about the rotor differences.

Well done.


The 900 rotor is 15% heavier and one piece.

1967 Yamaha TD1C 250, 2014 Kawasaki W800, 2011 Aprilia Tuono 1000 V4, 2020 Yamaha XSR900

"At the cutting edge of technophobia" Scotland_180-animated-flag-gifs.gif mccoy.gif


#115 MaxTDM

MaxTDM

    arrived on last train

  • Member
  • 1 posts
  • Location:Bicaz,Romania
  • TDM model: 1992

Posted 11 August 2012 - 06:22 am

QUOTE(anda3243 @ Tue 1st May 2012, 11:16 PM) <{POST_SNAPBACK}>
... I need to write about how the rear and front sprockets are aligned...

... If there is time I will convert the ignition coils to ones that are integrated in the plu caps.


Great work you've done here. Any news yet?


Mario.

#116 anda3243

anda3243

    really likes Carpe

  • Member
  • 89 posts
  • Location:Stockholm
  • TDM model: 1999

Posted 09 November 2012 - 10:53 pm

Hello. I am back after a long brake. There is much new stuff to write about.
First, finnish of the report on the build.

The Chain

Since the new motor has 6 gears, the front sprocket is moved outwards. This messes up the alignment of the chain.

Posted Image

My first idea was to move out the rear sprocket a little and move in the front sprocket a little.
The rear sprocket, spacer plate and sprocket hub.
Posted Image

Posted Image
The thickness of the plate was 4 or 5 mm.

The front sprocket is a aftermarket part for Honda CBR1000RR. It 18 teeth and for a 520 chain. The spline is exactly the same as the TDM 900. The greater number of teeth to be able to move the sprocket closer to the motor without interfering with the gearbox casing. There are some more space on a greater radius.

Removing the shpulder on the front sprocket.

Posted Image

Assamble front sprocket, rear wheel and other needed parts

Posted Image

And now it was time for the first test ride. :lol:

But immediately a problem, the interference between the chain and the frame was too big. You could not hear the motor over the chain grinding against the frame.

#117 anda3243

anda3243

    really likes Carpe

  • Member
  • 89 posts
  • Location:Stockholm
  • TDM model: 1999

Posted 09 November 2012 - 11:46 pm

The chain cont.

The chain needed to go inward. And the frame needed some work too.
The rear sprocket spacer was removed.
The bushing behind the front sprocket needed to be shortened. But it was stuck on the shaft. It is interference fit. I did not want to heat it upp to much as the rubber seal could be damaged.
Here I am drilling a hole for the puller.
Posted Image
First a small drill, then a bigger one.
The outgoing shaft seems to be case hardened. Hard on the surface, but quite soft/easy to work with inside.
You can see the first failed attempt to weld the puller to the bushing.

The protective plate behind the sprocket (the one with 3 screws) will be removed later to make space for the chain.
Posted Image

Succes with the bushing.

Posted Image

Lathe again. Carefull not to damage the surface for the rubber seal.
Posted Image

Done
I don't remember by how much I shortened the bushing.

Posted Image

One of the shoulders was machined away so its flush with the side surface. The visible side on the photo goes inward against the bushing.
Posted Image

On the frame. The footpeg bolt were grinded down, and some grinding was done on the frame as well.

Posted Image

Posted Image

Then assemble everything again.

Posted Image

The gear lever mechanism and the generator cover is from the 850. It is the same spline on the gear lever shaft on the 850 and 900 motors. By using the 850 gear lever and generator cover one can get the right distance to the footpeg.
The inner sprocket cover is also from the 850, but a hole was needed for the protruding shaft and nut.
But the top sprocket cover cannot be fitted. The 850 cover does not fit because the gear lever shaft is sticking out from the motor too much. The 900 sprocket cover does not fit because the gear lever mechanism is routed as on the 850.

With these mods, rear sprocket as is, front sprocket moved inwards, the bike was ridable. There was a little interference sometimes, but it was ok.
Also the front sprocket was for a 520 chain, the chain in the bike was 525. Rear sprocket was also 525. This allows for some misalignment.
Now i have ridden several thousands of km and there are now abnormal wear.

Also with the 18 tooth front sprocket the gearing was quite high.

#118 wicklamulla

wicklamulla

    is it Jizzy Rascal time yet.....?

  • Supporting Member(thanks)
  • PipPipPipPipPipPipPipPip
  • 12,211 posts
  • Location:Parish of Cruwys (pronounced 'Cruise' just loike Tom) Morchard, Mid Devon.
  • TDM model: 1999

Posted 10 November 2012 - 10:05 pm

Hey Anda great work and thank you for the update and report. Do you want to show us some more photographs of the finished bike. Wick.

spyball alarm/immob, bluespot brake calipers and Stainless hoses, Fournales air adjustable shock with Remote Resevoir, forks raised 10mm thru yokes, racetech linear fork springs in 15 wt oil, Kappa wingrack/luggage, heated grips, Kedo handguards, dual heat controller to power heated jacket liner and or pants!!, Stebel 136DB horn, K&N air filter, colour matched Baglux tank cover (magnetic tank bag modified to fit cover), osram +50% headloight bulbs, headlight protector,"NitramSpecial" parking loight, tail light indicators all running on LED's & incorporate "Lite Buddies", MK7 Scottoiler fitted, taller screen, 2-2 stainless steel CCC's, Devil stainless down pipes. MKI Renntec engine crash bars & sump guard.
engine changed july 2007 on a dyno run it made 79.1BHP / Torque 59.9Had a brief flirtation with a 1999 MKIIa but it blew an exaust valve on the M5 so was sold on to be repaired.

I loike tay and hang sangwiches !

www.kenhogantreeservices.co.uk

http://s33.photobuck...77/wickla/?sc=6


http://reg.imageshack.us/v_images.php

post-1-1150550733.gifpost-1-1150550726.gifpost-1-1150559830.gif


#119 anda3243

anda3243

    really likes Carpe

  • Member
  • 89 posts
  • Location:Stockholm
  • TDM model: 1999

Posted 11 November 2012 - 09:24 pm

It seems as I don,t have pics from just after the assembly.
Here is one from early spring 2012

Posted Image

Action pic from this summer
Posted Image

This afternoon
Posted Image

#120 anda3243

anda3243

    really likes Carpe

  • Member
  • 89 posts
  • Location:Stockholm
  • TDM model: 1999

Posted 11 November 2012 - 09:45 pm

First impressions

The first ride was a bit of a disappointment. The engine didnt seem to have the power I thought it would. The whole bike felt unstable. The fairing didn't do its job. The footpegs felt wrong.. and some other things that irritated me.
Despite all this it was a step up from my -81 Honda Boldor.....

I did some carb tuning
Posted Image

One can reach the carb balancing screw without removing the air filter housing.

Posted Image

Temporary fuel tank

Posted Image


Also attaching the handlebar grips properly. Tape to take the play and strong glue.

Posted Image


The carb synk made a big difference. The bike felt completely different.
Also put some more air in the tires. It was eay too low pressure. That improved the handling alot.
Did also some other small improvements.
All this made me to like the bike better, but still, the handling was not good, it felt like I could not trust the bike. It had grip, but it felt like it would let go any moment.
Also the windscreen was terrible. As noted in earlier post.

But I used the bike like this all autumn 2011 and spring 2012.


4 user(s) are reading this topic

0 members, 4 guests, 0 anonymous users