


So my YSS PD 360 fork valve emulators finally arrived from Simon at bikerevival.co.uk (£66 delivered). Got to work, armed with Carpe knowledge in general and support from Bjørge and Dandy Warhol in special (muchos gracias!).
Very straight forward job, couple of hours work barring mishaps or stuck bolts. I took a few pics, and also gleaned an understanding of the existing rebound adjustment that I haven't been able to find explained online. I'll elaborate on that in another post.
I put the rear on a paddock stand and suspended the front from the garage roof with simple ratchet straps hooked to the bar.
 Bike suspended.jpg 130.85KB
0 downloads
Bike suspended.jpg 130.85KB
0 downloads
I didn't have a 19 mm hex bit for the front wheel axle bolt, so I had to improvise one:
Wheel bolt tool.jpg 143.96KB
0 downloads
Fork legs came off easily. First release the spring preload all the way, loosen upper pinch bolt, then loosen the caps a half turn, then loosen the lower pinch bolts.
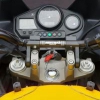
After taking off the caps with the rebound adjuster rods I drained the legs. Surprisingly, one had a light grayish gluelike substance in it, the other a very dirty dark oil. I know the fork gaskets was changed by the previous owner only a few thousand kms ago, so I really expected to find better oil than this.
Bottom bolts spun out without protests with an impact driver. A fairly long 10 mm hex bit is needed. Another surprise - quite a bit of oil was left in the forks and obviously started leaking all over the place as soon as the bolts were out.
The valves comes directly on top of the compression piston that is bolted to the bottom of the fork, and additional 8 mm holes must be drilled and deburred in the piston stem. I decided to keep the rebound rotary valve for now.I set the valve preload at two turns, and left the rotary valve at its smallest opening. I did not braze shut the rebound adjustment hole, nor did I enlarge the lower oil return hole (none of which are mentioned in the YSS instructions, but I have seen it in some Race Tech instructions, and the valves are pretty much the same).
YSS valve placement.jpg 52.04KB
0 downloads
YSS valve detail.jpg 72.91KB
0 downloads
The spacers have to be shortened in accordance with the extra height added by the valves. I have a small metal lathe that I convinced myself I could not live without owning years ago (turned out I was right), otherwise a hack saw would do it, too. I removed a couple of mm less than the the height of the valve, to give just a little more preload when assembled. Rear end is elevated 25 mm by means of shorter dog bones, so that is why I want a little bit more leeway in the front, too.
One spacer cut.jpg 155.49KB
0 downloads
Both spacers cut.jpg 165.56KB
0 downloads
The original rebound adjusting rod has to be cut. This is the point of no return to the original setup (the extra holes in the compression piston stem are easily covered with a sleeve if needed).
Rebound adjuster cut.jpg 108.92KB
0 downloads
For oil I went with ATF Dexron III, and put exactly 500 ml in each leg.
Reassembly was straight forward and surprisingly devoid of nasty surprises.
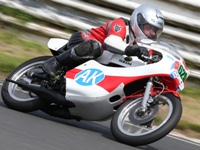
Then test ride! Did the bike transform completely, to a modern day superbike wonder, plush and firm at the same time??
Not really. It still dives on low speed sudden braking, and it is still somewhat hard over speed bumps at slightly higher-than-adviced speed (only for test purposes, mind you). Twisties at speed are just as fun as ever, and it tracks curves wonderfully and reliably. But then again, I wasn't unhappy with it before. I'll give it some time, and then perhaps fiddle a bit with the valve pretension, rotary valve and eventually oil weight.
Edited by Norwegian, 11 May 2021 - 11:33 am.


 ) - do I remove it all, or widen out the existing holes as much as possible?


