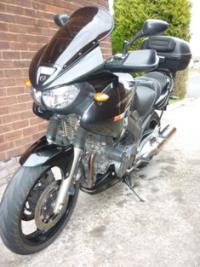
- is a right PITA.
I want to take my shock to Dumfermline Motorcycles while they are still fettling suspension bits. It's done over 40,000 miles in its 10½ years and, while I can't identify any specific problems, for the price it seems a good idea while I'm doing the annual service.
BUT getting the bu**er out is blithely skimmed over in the workshop manuals, both plain and ABS. Also any results from a Search here were short of details of how to overcome the intrusion into the working space by the bits displaced by the ABS components, specifically the coolant overflow bottle that sits to the left of the upper shock mounting bolt and interferes with removing said bolt.
So for the benefit of others who may want to remove theirs here's my notes.
1. Remove wheel, hugger, suspension link bolts. (I took it all off for the annual grease)
2. Lower swingarm as much as the brake hoses allow and support it.
3. Undo nut and washer holding coolant bottle, behind LHS fillet. Spring its tab off the bolt and force bottle as high up as possile. This will align a recess in the bottle with the shock's top bolt.
4. Get good lighting on the top of the shock. See pic #1
5. Assemble tools: a long strong screwdriver, two 14mm combination spanners and a third about the same size, hammer. An assistant who can stand you swearing will be a bonus.
6. Fit the spanner ring ends over the bolt head on LHS and nut on RHS. To get the required torque I interlinked the extra spanner's ring onto the open end of the nut's spanner. See pic #2.
7. Remove the nut and its washer. Push the bolt as far left as the bottle will allow.
8. Now use the screwdriver as a lever against bits of chassis to squash the bottle as much as you dare, and manipulate the bolt to the left. It will jam slightly diagonally in the recess in the bottle, temptingly close to coming out and releasing the shock, but not quite.
9. Practise your swearing, then apply the screwdriver under the bolt head flange from outside the RHS of the bike and hammer the bolt to the left.
10. Repeat #9 varying the angle of the s'driver. Repeatedly!
11. Shout jubilantly when the bl**dy thing surprises you by popping out and dropping the shock down.
12. Put the bolt back in the clevis from the RHS, add the washer and nut and tighten to see how much thread sticks out of the end of the nut,
13. Remove bolt and file its end down to leave just one thread outside the nut. You need to leave enough for the nut's locking part to work.
14. When rebuilding put the bolt in from the RHS, i.e. how the factory should have done it in the first place.
15. Bolt the coolant bottle back in place, checking the two hoses are correct.
I had planned to take the shock over on Friday, but various dead-end attempts held me up (I now know how to swear at the battery too!) and now it'll be Monday. I'll report back on progress.
 IMG_0360.JPG 226.45KB
5 downloads
(Earlier problem of no pic posting fixed - thank you Studley.)
Edited by steve27bha, 17 February 2020 - 05:31 pm.


